
Appearance
Sharing Projects
Control who can access your projects by sharing them with individual users or teams.
How to Share a Project
- Navigate to the Projects page from the sidebar
- Select a project by clicking its checkbox
- Click the Share icon in the action toolbar that appears above the project list
This opens the Share dialog.
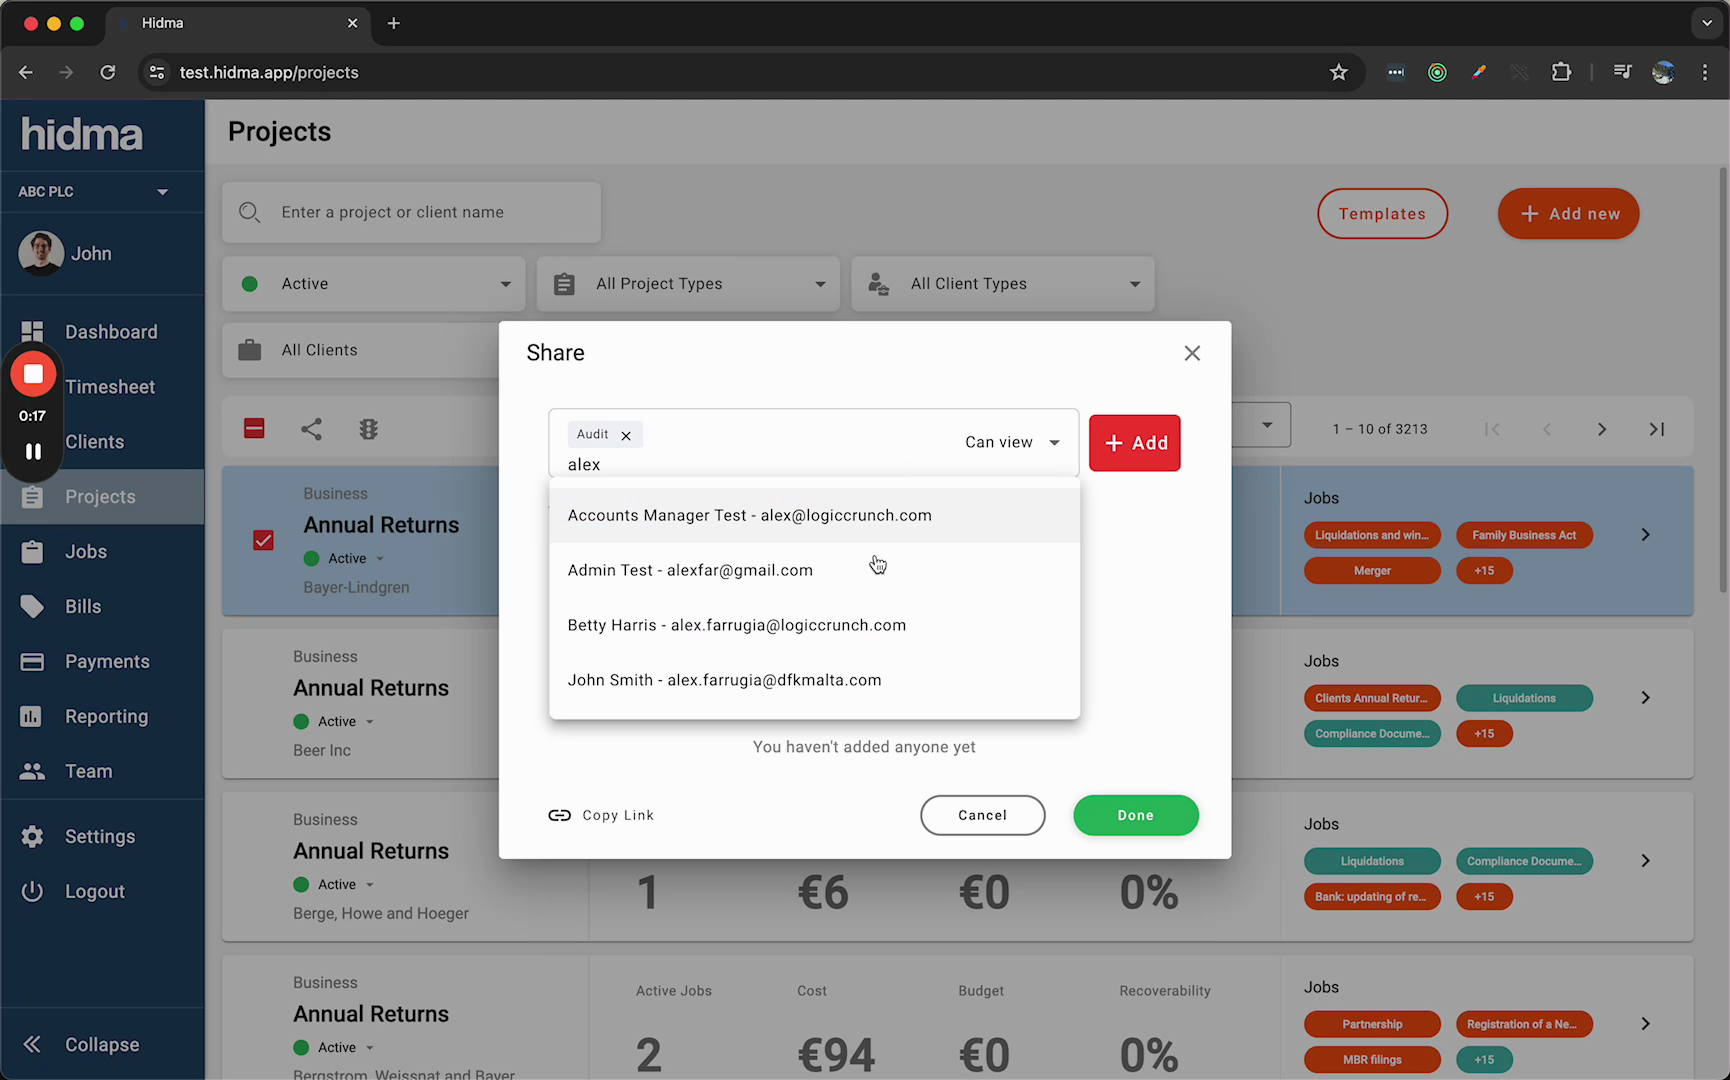
The Share Dialog
The Share dialog contains:
- Search field — labelled "Insert user name, email or team" — for finding users and teams to share with
- Permission dropdown — set to Can view by default — choose the access level before adding
- + Add button — adds the selected user or team with the chosen permission
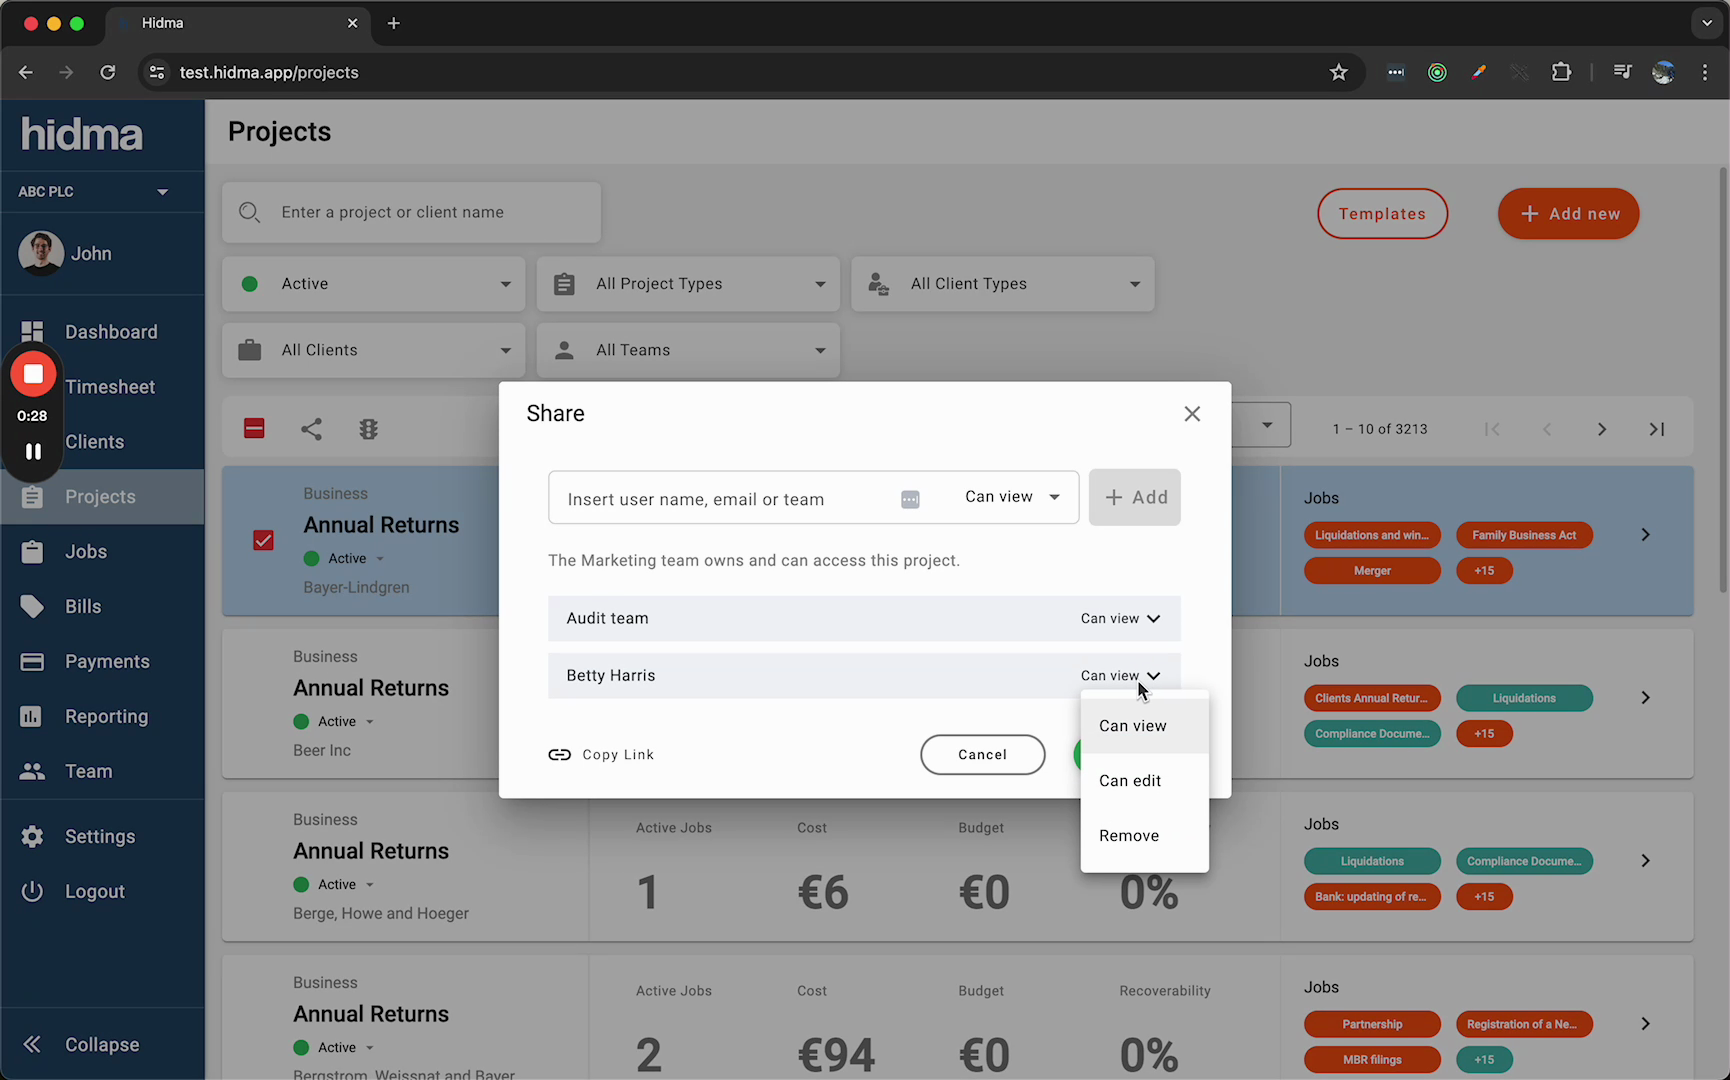
- Owner info — displays which team owns the project (e.g. "The Marketing team owns and can access this project")
- Shared list — shows all users and teams you've added, each with their own permission dropdown
- Copy Link — copies a shareable link to the project
- Cancel and Share buttons — discard or save your changes
Adding Users and Teams
Type a name, email address, or team name into the search field. As you type, Hidma shows matching suggestions with the user's name and email address, or team name.
To add someone:
- Type their name, email, or team name in the search field
- Select the matching user or team from the dropdown suggestions
- Choose the permission level from the dropdown (Can view or Can edit)
- Click + Add
They appear in the shared list below. You can add multiple users and teams before saving.
Permission Levels
There are two permission levels:
| Permission | Description |
|---|---|
| Can view | Can see the project and its details, and log time against it. This is the most common permission for team members who need to track their hours on a project. |
| Can edit | Everything in Can view, plus the ability to manage the project — make changes to its settings, update details, and share it with other users or teams. Suitable for project managers or team leads. |
Managing Shared Access
Once users or teams have been added, each entry in the shared list has its own permission dropdown. Click it to:
- Change to Can view
- Change to Can edit
- Remove — revokes the user's or team's access entirely
Saving and Confirmation
Click the green Share button to save your changes. A success banner appears at the top of the page confirming "Your project has been shared!"
Sharing with Teams
You can share with entire teams rather than adding individuals one by one. When you share with a team, all members of that team get access to the project. This is useful for practice groups or departments that consistently work together on projects.
Copy Link
The Copy Link button at the bottom of the Share dialog copies a direct link to the project. You can paste this link in messages or emails to give colleagues quick access.
Best Practices
Sharing Tips
- Share at project creation — add your team members right away so they can find the project in their timesheets
- Use teams for groups — share with a team instead of adding each person individually
- Default to Can view — only grant Can edit to people who need to make changes
- Review access periodically — remove users who have rolled off the project
Related Topics
- Creating Projects — Setting up new projects
- Project Templates — Reusable project structures
- Teams — Managing teams